Summary: in this tutorial, you will learn about React Props and how to use the Props system to pass data between React components.
Introduction to React Props
React props are a mechanism that allows you to pass data from one component to another within a React application.
We’ll build a simple React application to illustrate how the React props system works. The application will show three books including the book covers, titles, and authors:
In this book app, we have three books that have the same structure:
- Cover Image
- Book Title
- Author
In React, you can return the same copy of JSX and change the cover image, book title, and author:
export const App = () => {
  return (
    <main>
      <h1>Favorite Books</h1>

      <section>
        <img />
        <h2>Mastering React</h2>
        <p>By Anthony Pham</p>
      </section>

      <section>
        <img />
        <h2>Mastering React</h2>
        <p>By Anthony Pham</p>
      </section>

      <section>
        <img />
        <h2>Mastering React</h2>
        <p>By Anthony Pham</p>
      </section>
    </main>
  );
};Code language: JavaScript (javascript)
However, it is better to create a reusable component called Book. The Book component should be able to display different cover images, titles, and authors:
export const App = () => {
  return (
    <main>
      <h1>Favorite Books</h1>
      <Book />
      <Book />
      <Book />
    </main>
  );
};Code language: JavaScript (javascript)
The question is how to pass data such as cover image, title, and author from the App component to each Book component. We can accomplish this using the React Props system.
Component hierarchy
In React, a component hierarchy is how React arranges components in a nested manner, forming a tree-like structure.
- Parent components are components that contain one or more other components. They pass data (props) down to their children.
- Child components are components nested within a parent component. Child components receive data from the parent component via props.
- Sibling components are the components that share the same parent component. They have the same level in the component hierarchy.
The following picture shows the component hierarchy of the React application that we are about to create:

Creating a React app
First, open a Command Prompt on Windows or a Terminal on Unix-like systems.
Second, run the npx create-react-app command to create a new react app called book:
npx create-react-app bookCode language: JavaScript (javascript)Third, open the project directory in your favorite code editor and delete all the files under the src directory.
Fourth, create a new index.js file with the following code:
import ReactDOM from 'react-dom/client';
import App from './App.js';

const el = document.querySelector('#root');
const root = ReactDOM.createRoot(el);

root.render(<App />);Code language: JavaScript (javascript)
The index.js file displays the App component on the screen.
Fifth, create the App.js file in the same src directory that stores the App component:
const App = () => {
   return <h1>Book App</h1>;
};

export default App;Code language: JavaScript (javascript)
The App component will create three copies of the Book component and show them on the screen. But for now, it returns a <h1> tag with text.
In the App.js file, we use a default export:
export default App;Code language: JavaScript (javascript)When importing the App component into a file, we can use its name directly without using a pair of curly braces:
import App from './App.js';Code language: JavaScript (javascript)If you don’t use a default export but named export instead, for example:
export const App = () => {
  // ...
}Code language: JavaScript (javascript)
Then, you need to surround it with a pair of curly braces when importing it:
import { App } from './App.js';Code language: JavaScript (javascript)Note that a module can have only one default export.
Finally, run the book by executing the following command on the terminal:
npm startCode language: JavaScript (javascript)You’ll see the following screen on the web browser:

Creating a reusable Book component
First, create a Book.js file in the src directory:
const Book = () => {
   return <p>Book</p>;
};

export default Book;Code language: JavaScript (javascript)
The Book component returns a simple <p> element. We’ll modify it later.
Second, import the Book component into the App component and modify the App component to return a Book component:
import Book from './Book';

const App = () => {
  return (
    <main>
      <h1>Favorite Books</h1>
      <Book />
      <Book />
      <Book />
    </main>
  );
};

export default App;Code language: JavaScript (javascript)
In this component,
1) Import the Book component:
import Book from './Book';Code language: JavaScript (javascript)2) Render the Book component in JSX:
<Book />Code language: JavaScript (javascript)Third, passing data from the App component to the Book component using props:
import Book from './Book';

const App = () => {
  return (
    <main>
      <h1>Favorite Books</h1>
      <Book title="Mastering React" author="Anthony Pham" />
    </main>
  );
};

export default App;Code language: JavaScript (javascript)
In the App component, we set the title and author props of the Book component to corresponding strings:
<Book title="Mastering React" author="Anthony Pham" />Code language: JavaScript (javascript)In the Book component, we can receive these values as the properties of a props object. The props object is an argument of the component function:
const Book = (props) => {
  return <p>Book</p>;
};

export default Book;Code language: JavaScript (javascript)
Through the props object, you can access the title and author data within the component:
const book = (props) => {
  return (
    <section>
      <h2>{props.title}</h2>
      <p>By {props.author}</p>
    </section>
  );
};

export default book;Code language: JavaScript (javascript)
To make code more concise, you can use the object destructuring by destructuring the properties of the props object into individual variables:
const book = ({title, author}) => {
  return (
    <section>
      <h2>{title}</h2>
      <p>By {author}</p>
    </section>
  );
};

export default book;Code language: JavaScript (javascript)
The app will look like this on the web browser:
Fourth, modify the App component to add two more Book components to the returning JSX but use different props:
import Book from './Book';

const App = () => {
  return (
    <main>
      <h1>Favorite Books</h1>
      <Book title="Mastering React" author="Anthony Pham" />
      <Book title="Practical React" author="Alex Johnson" />
      <Book title="React in Action" author="Bob Climo" />
    </main>
  );
};

export default App;Code language: JavaScript (javascript)
You’ll see that the app renders three books on the screen:
Adding images to the React app
First, download the following zip file that contains three images and extract it to the src directory under the project directory:
Second, import these three images into the App component using the import statement and pass them as a prop to the Book component:
import React from 'react';
import Book from './Book';
import MasteringReact from './mastering react.svg';
import PracticalReact from './practical react.svg';
import ReactInAction from './react in action.svg';

const App = () => {
  return (
    <main>
      <h1>Favorite Books</h1>
      <div>
        <Book
          title="Mastering React"
          author="Anthony Pham"
          cover={MasteringReact}
        />
        <Book
          title="Practical React"
          author="Alex Johnson"
          cover={PracticalReact}
        />
        <Book
          title="React in Action"
          author="Bob Climo"
          cover={ReactInAction}
        />
      </div>
    </main>
  );
};

export default App;Code language: JavaScript (javascript)
Third, modify the Book component to show the image passed down from the App component:
const Book = ({ title, cover, author }) => {
  return (
    <section>
      <img src={cover} alt={title} />
      <h2>{title}</h2>
      <p>By {author}</p>
    </section>
  );
};

export default Book;Code language: JavaScript (javascript)
The app shows three images but they are quite large. To make it more beautiful, we can add some CSS styles to the app.
Adding style.css to the React app
First, create a new style.css in the src directory with the following code:
* {
  margin: 0;
  padding: 0;
  box-sizing: border-box;
}

body {
  font-family: system-ui, -apple-system, BlinkMacSystemFont, 'Segoe UI', Roboto,
    Oxygen, Ubuntu, Cantarell, 'Open Sans', 'Helvetica Neue', sans-serif;
  font-size: 1rem;
  line-height: 1.5;

  /* center*/
  display: flex;
  justify-content: center;
  align-items: center;
  height: 100vh;
}
h1 {
  margin-bottom: 1.5rem;
}

.book-list {
  display: flex;
  flex-direction: row;
  gap: 2rem;
}

.book-cover {
  width: 150px;
}

.book-title {
  font-size: 1.2rem;
}

.book-author {
  color: gray;
}
Code language: CSS (css)
Second, import the style.css file into the App component and change the JSX of the App component to include the class names:
import React from 'react';
import Book from './Book';
import MasteringReact from './mastering react.svg';
import PracticalReact from './practical react.svg';
import ReactInAction from './react in action.svg';
import './style.css';

export const App = () => {
  return (
    <main>
      <h1>Favorite Books</h1>
      <div className="book-list">
        <Book
          title="Mastering React"
          author="Anthony Pham"
          cover={MasteringReact}
        />
        <Book
          title="Practical React"
          author="Alex Johnson"
          cover={PracticalReact}
        />
        <Book
          title="React in Action"
          author="Bob Climo"
          cover={ReactInAction}
        />
      </div>
    </main>
  );
};
Code language: JavaScript (javascript)
Third, add class names to the JSX of the Book component:
const Book = ({ title, cover, author }) => {
return (
<section className="book">
<img src={cover} alt={title} className="book-cover" />
<h2 className="book-title">{title}</h2>
<p className="book-author">By {author}</p>
</section>
);
};
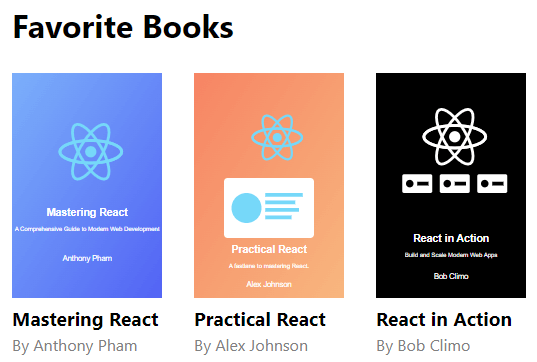
export default Book;Code language: JavaScript (javascript)The app will look like what we expected:
Summary
- Use React props to pass data down from parent to child components.